
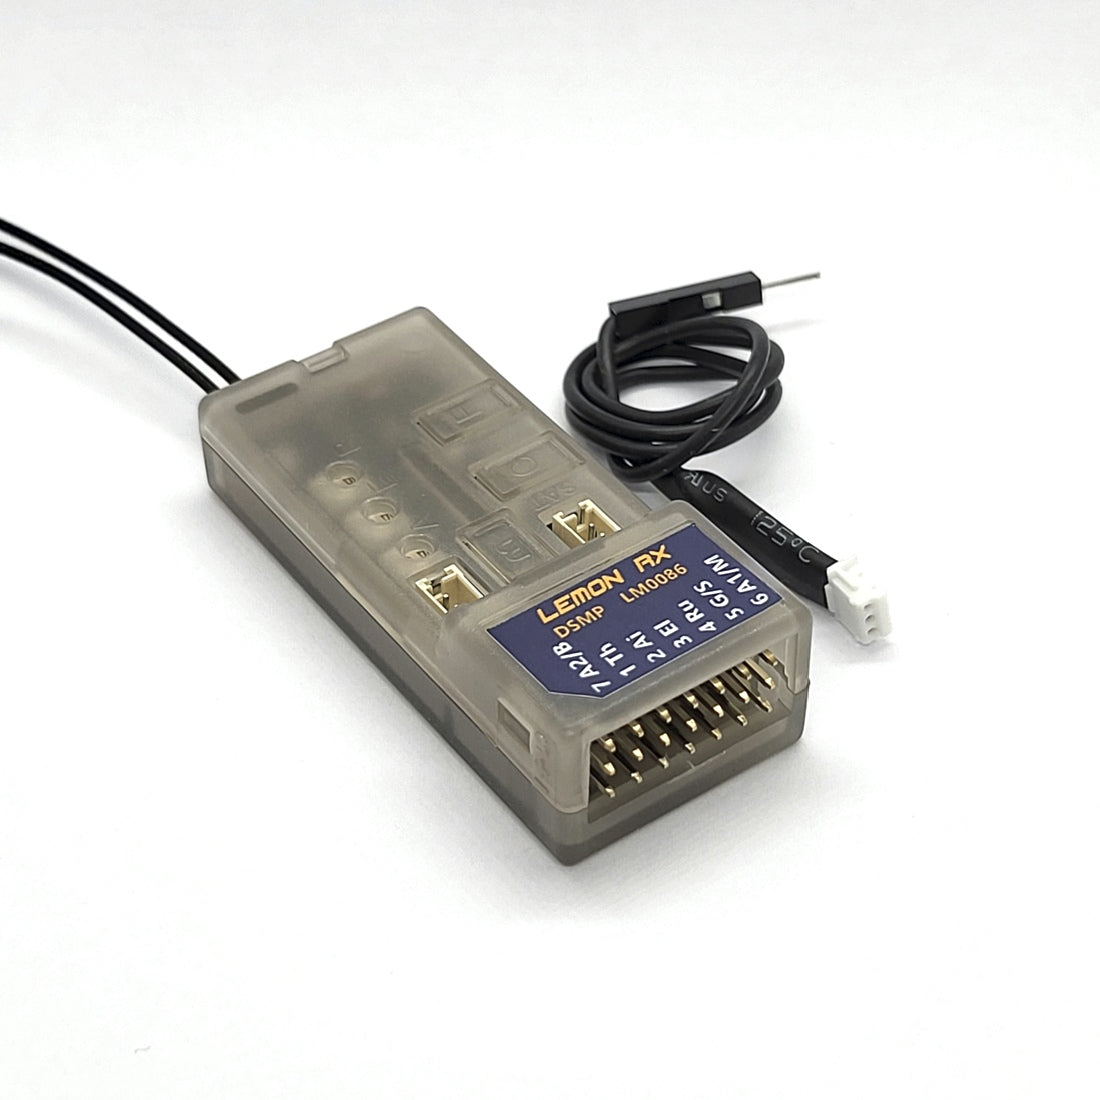


Description
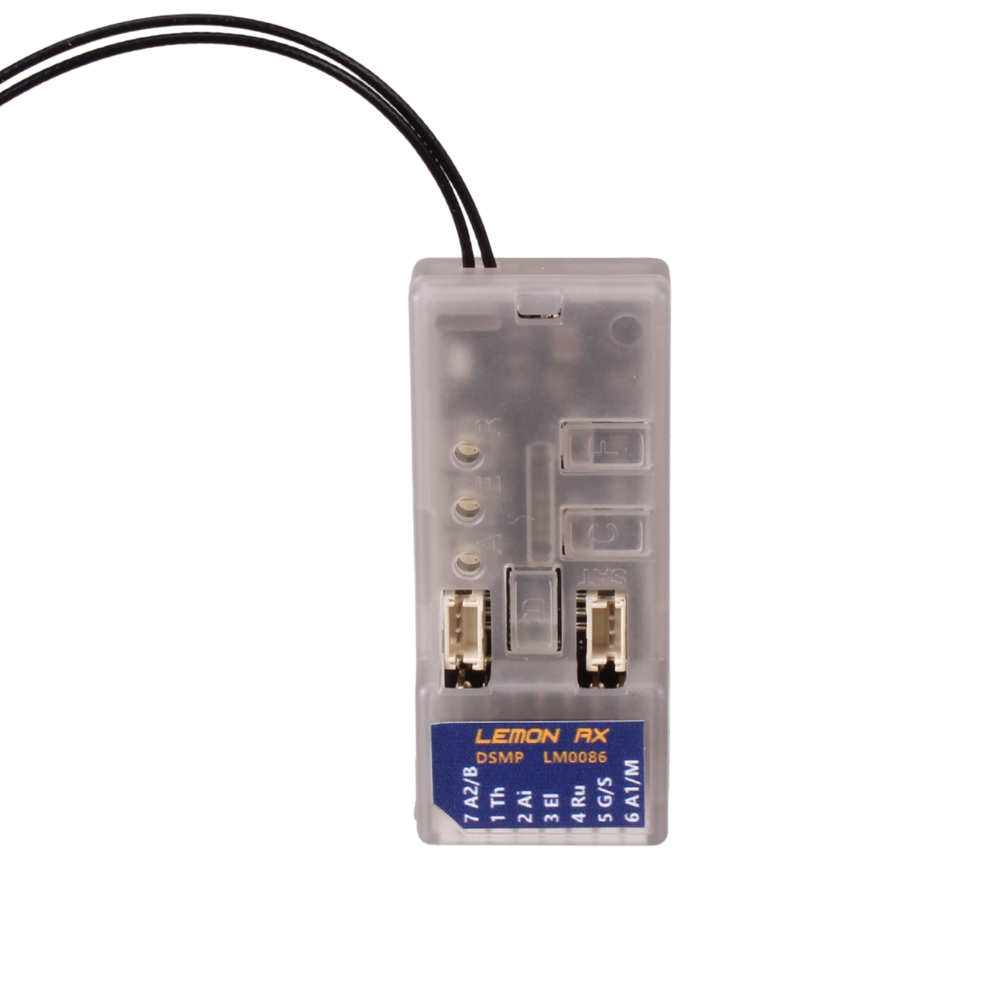
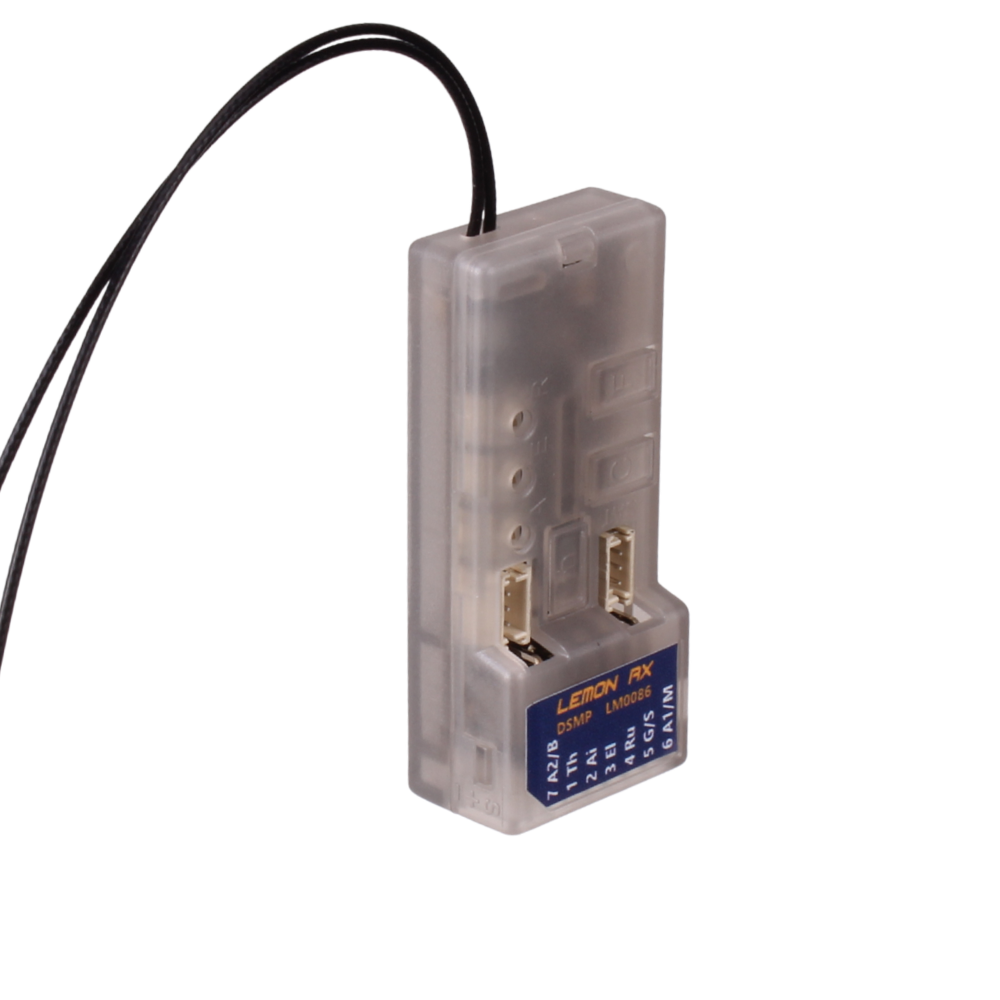
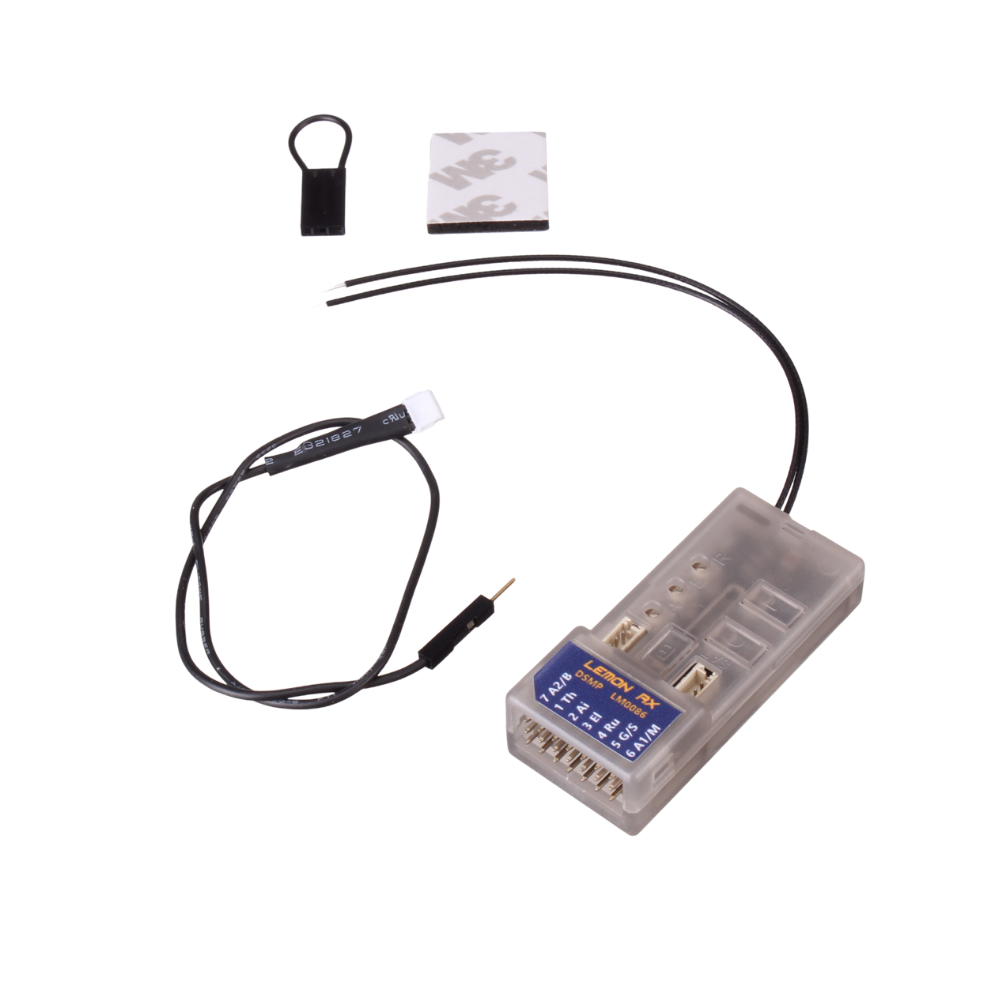
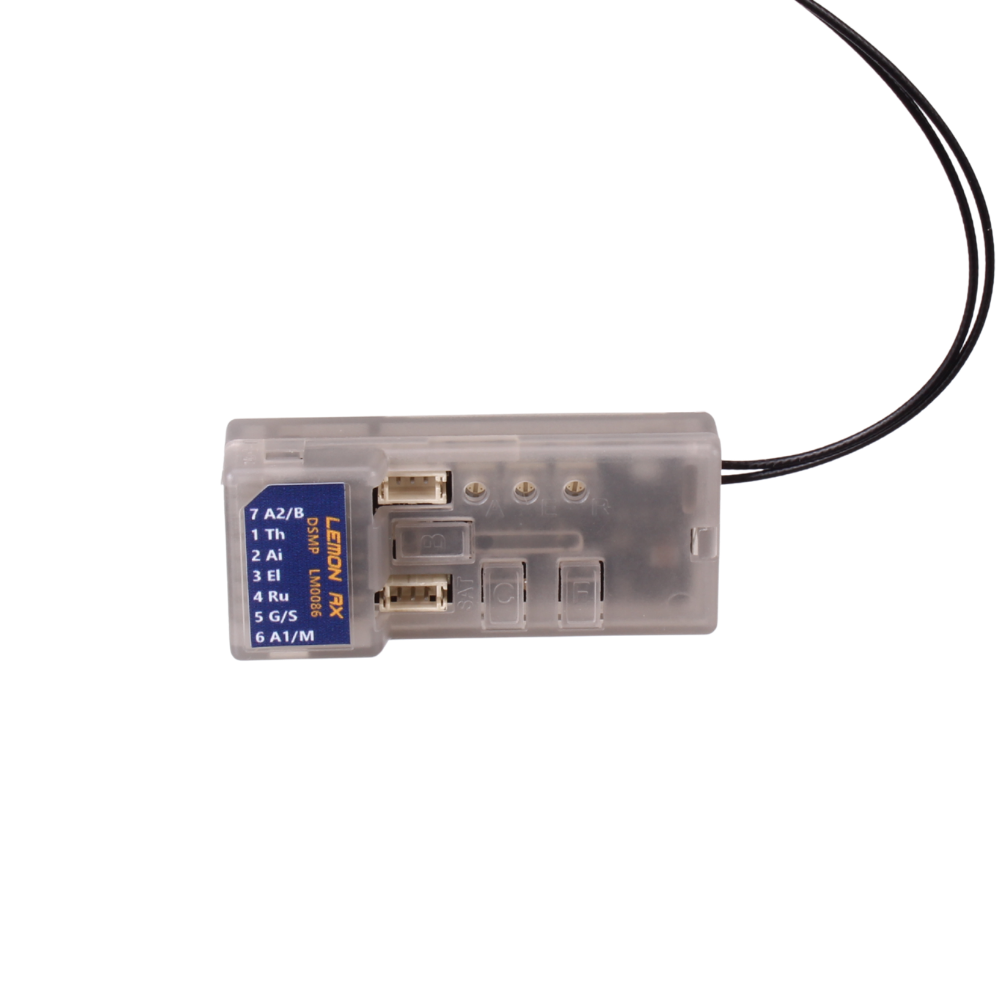
Lemon Rx DSMP 7-CH TELEMETRY STABILIZER & VOLTAGE PROBE (DSMX/DSM2 COMPATIBLE)
| Dimension: |
55mm x 15mm x 23mm |
| Recommended voltage range: |
3.9V to 8.5V (2S LiPo capable) |
| Telemetry Option: |
Integrated with Barometer, Altimeter, Energy meter (Require V/I sensor) and Internal Temperature Sensor |
| Technology: |
DSMP with GEN2 SDR stack (DSMX / DSM2 compatibility) |
The DSMX/DSM2 compatible 2nd generation DSMP 7-channel telemetry stabilizer has undergone a complete redesign, resulting in the ultimate reliability, performance, and features. The stabilizer comes equipped with full telemetry features, including a built-in barometer, altimeter, energy meter (measuring current, voltage, and mAh), and an internal temperature sensor. It also features a high-sensitivity gyro with a proprietary stabilization algorithm, ensuring responsive airplane control for electric applications.
The BEC1 and BEC2 dual inputs provide high-reliability operation while improving setup for high current drain performance servo. The stabilizer supports stabilization with separated channel dual aileron operation and has built-in Delta, V-tail, and Normal Wing mixers. Additionally, it offers a stabilization always-on feature, real-time variable stabilization gain control on channel 8, and an all-channel failsafe.
The firmware health monitoring software stack and ultra-low operational voltage (3.6V) ensure the highest hardware reliability. The stabilizer also features a Generation 2 SDR stack, which offers the fastest channel searching and advanced algorithm for signal recovery, providing an ultra-low-latency experience. Furthermore, antenna diversity improves the reliability of the wireless link, and a satellite port offers additional signal diversity.
The stabilizer comes with three potentiometers for individual gain tuning and has gyro stabilization activation with either AUX2 or Gear channel. The user manual can be found at www.lemon-rx.com/manual.
To reset the stabilizer, connect power, hold the F and B buttons for approximately five seconds until all LEDs flash randomly, then press the C button. Multiple LEDs flash a few times to complete the operation.
To bind the stabilizer with a bind plug, insert the bind plug on Channel 7 and connect power. To bind without a bind plug, connect power and hold the B button until the red LED flashes. To bind with a satellite without a bind plug, connect power, hold the B button until the red LED flashes, disconnect power, plug the satellite wire connector into the stabilizer, and connect power.
To change the failsafe setting, press the F button for three seconds until the green LED changes from off to on and vice versa. The channel value is saved as failsafe default at the time the green LED turns on. Turn off the transmitter and wait two seconds to ensure the failsafe is activated accordingly.
To activate stabilization, disconnect power, insert a bind plug to channel 5, hold the C button, connect power, wait for about one second until the six LEDs flash, release the C button, press C to make changes within three seconds, wait for three seconds, and remove the bind plug. Green represents CH7, and blue represents CH5.
To configure Wing Mode and Dual Aileron, disconnect power, insert a bind plug to channel 6, hold the C button, connect power, wait for about one second until the six LEDs flash, check the receiver label/user manual to understand the referred LEDs' operation, release the C button, observe which red LED is flashing, and press C to select the required mode. Press C to toggle between settings. On means selected, and it exits automatically in five seconds. Wait for three seconds and remove the bind plug. Ensure transmitter mixing is set accordingly for dual aileron if stabilized dual aileron is to be configured.
To calibrate the V/I sensor or V/I probe, turn on the receiver and transmitter and plug in the V/I sensor. Ensure the required DC loading device such as a brushless motor with ESC as well as the current and voltage meter is connected. Press the button for two seconds but no more than five seconds, observe three green LED flashes, ensure 8.4V